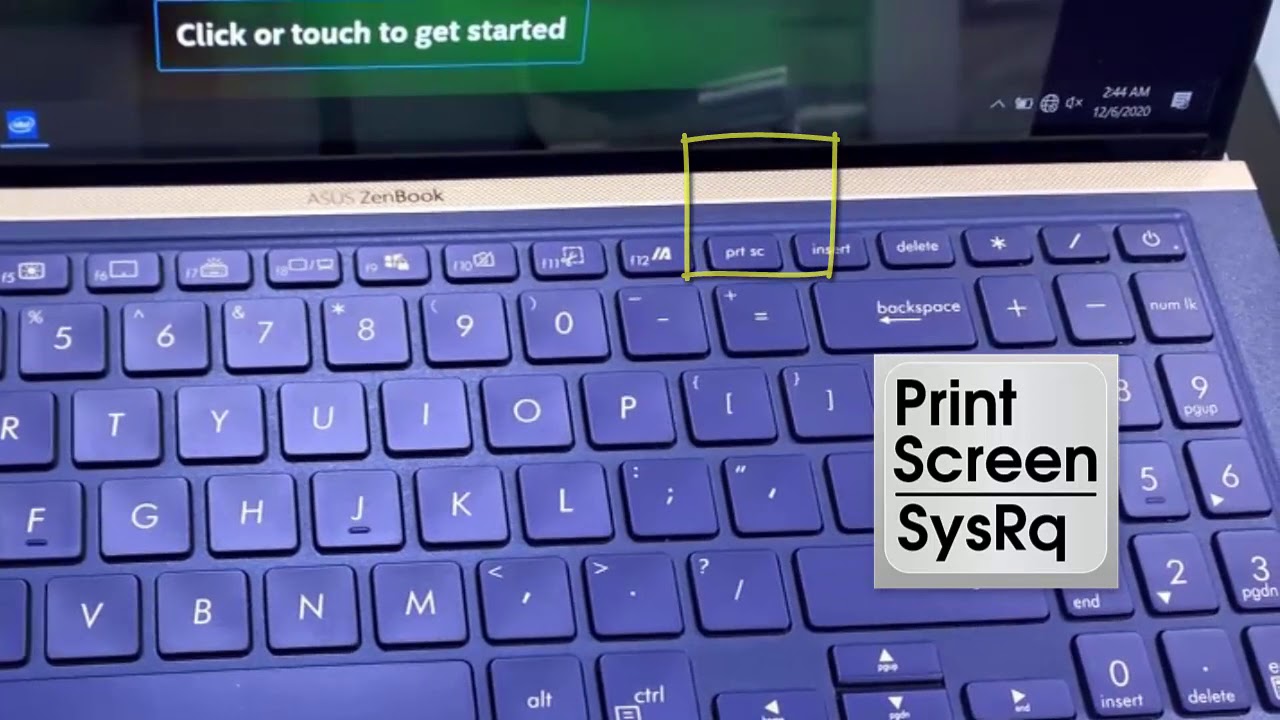
In this article, we are going to talk about how to screenshot the Asus laptop. Do you have no idea how to screenshot laptop Asus? Don’t worry, we are going to teach you’re a couple of techniques through which you can easily take a screenshot of the screen or a window.
It’s pretty simple. However, most people are not even aware of these simple tricks. We will divide the list into three parts. These three screenshotting techniques will surely make your experience a lot easier.
Many people are confused about how to screenshot on Asus Laptop. We just did it a lot easier for you.
Taking a screenshot of the Whole Screen
So how to take a screenshot on Asus Laptop? There are two methods of taking a screenshot of the whole screen too.
The first technique is to just click the “prt sc” or print screen button and then paste it into the paint app. That way you can save it with minimum efforts.
- Click on Prt Scr / Print Screen button.
- Open Paint.
- Paste using “CTRL+V” in the paint app.
- Save the screenshot.
It’s as simple as a cake. This is how you do the Asus Pc screenshot. Now to the other method of how to screenshot Asus Pc.
The second technique to take a full-screen screenshot is to press “Win+Prt Sc”. It seems pretty self-explanatory to me.
Click “Windows Key + Prt Sc”.
Your screenshot will be saved in the Documents folder.
This is how you screenshot the Asus laptop with minimum efforts.
Taking Screenshot of Current Window
This method incorporates the technique of how to screenshot the Asus laptop’s current window. The method is rather simple and easy to implement. Just follow our steps:
- Select a current window. (Click anywhere on the window you want to take a screenshot of).
- Press (ALT+Prt Sc).
- Open Paint app.
- Paste it by pressing (Ctrl+V)
- Save the screenshot that appeared in Paint app.
The shortcut key to save the screenshot of Asus laptop is “CTRL+S”. It will ask for the directory of where you want to save the file.
Custom Screenshot
Finally, the most interesting technique of them all. How to screenshot Asus Laptop using the custom screenshot technique. Just follow our technique and everything should be alright.
Using Windows 10 Technique
Hold “Windows+Shift+S”.
Windows 10 screenshot app will open and there will be all sorts of shapes.
Using those shapes you can take custom screenshot.
Just save the screenshot and you’re good to go.
This is how you screenshot Asus laptop with windows 10’s own screenshot taker.
Snipping Tool
If you’re not on windows 10, then you won’t be able to use the upper steps we’ve mentioned. All versions of Windows from Vista to 10 have this snipping tool inbuilt into the OS. So you can use it to screenshot the Asus laptop easily. Also, you can use the best screenshot software.
- Go to windows search.
- Search for Snipping Tool.
- Click on it and a list of options will be available.
- You can take a screenshot of any shape you want.
That’s pretty much it. These are the techniques to screenshot the Asus laptop.


